Thursday, September 30, 2010

Scarecrow in a Corn Field

So, I know the other day I wrote a post about how you weren't going to hear much from me for a few weeks since I'm supposed to be packing, but these dang ideas keep flying into my head and have nowhere else to go, so I end up obsessing about them until I can't take it anymore and just have to make whatever I'm obsessing about. This time it was a scarecrow in a corn field.
Anyway, I was browsing the Silhouette library when I came across a creepy silhouette of a scarecrow. I bet he's actually a really cute scarecrow in person, but that silhouette of his could give ya the chills!
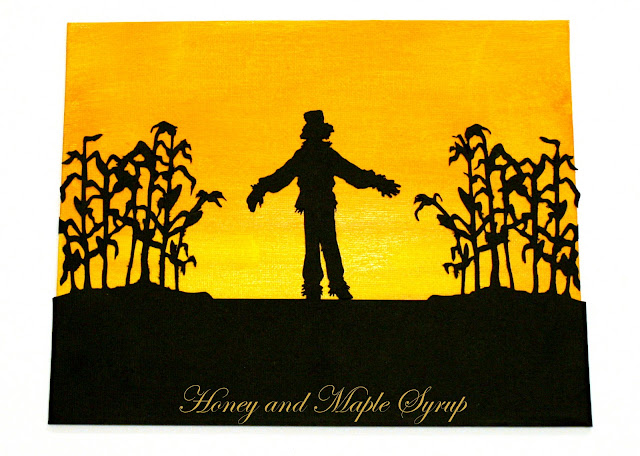
I also came across some corn stalks and thought , what would be creepier than the silhouette of a scarecrow? How about the creepy silhouette of a scarecrow in a corn field!

Now, I have to apologize in advance to people without this machine because I usually like to show projects that would be easy for anyone to make. Of course you can still make this, but it would just require more time and patience and a couple of broken fingers because it just hurts so dang bad to tediously cut out little intricate doodads. I guess now would be a good time to remind you that Christmas is coming up and it would be a great present to ask Santa to bring...unless of course you are on the naughty list ::tisk tisk::

Ok, totally getting off track here.

So, I put the scarecrow and cornstalks together in the Silhouette program and cut it out on black cardstock.


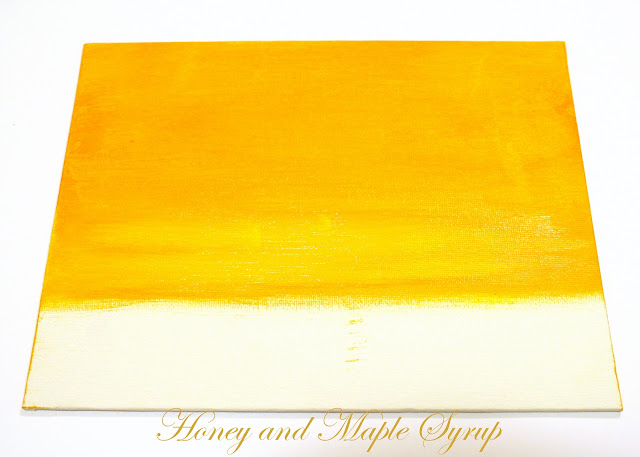
Next, I got an 8x10 canvas panel from Michael's and painted it orange, with a little bit of yellow on the horizon line to make it look like the sun was going down.


After the paint dried, I sprayed the back of the cardstock with spray adhesive and attached it to the front of the canvas.


This was such an easy project and I love how creepy it looks!


Photobucket


Funky Junk's Sat Nite Special
 
UndertheTableandDreaming

Tuesday, September 28, 2010

It's Almost Here!

Am I talking about Halloween? Nope. Maybe Fall? Not that either. Oh wait, Fall is here, but you can't tell with the 101 degree weather! But I'm not talking about either of those. What I am talking about is my move!

I know you guys are probably sick of hearing about it, and honestly, I'm sick of talking about it. I just want to get it over with already! Less than 2 weeks to go before we pack up the moving truck and embark on our journey across the U.S.


So having said that, I just wanted to let you guys know that things will probably be quiet over here for the next few weeks while I finish packing up and set out for the looooooooong drive. But when I'm back, I promise I will have LOTS to show you guys, so please stick around.
 =)


Thursday, September 23, 2010

'SPOOKY' Banner

I wanted to jump on the 'banner' bandwagon, and 'spooky' was the first word to pop in my head, so I just went with it.

I started out by cutting 'spooky' out with my new Silhouette machine. Now, you guys are probably thinking I'm one of those cool people who won one off of one of those even cooler blogs, but sadly I'm not. I wanted one so bad that my mom got me one for an early (very early!) birthday and Christmas present. Woohoo!!

Back to the spookiness, I also cut out some circles from orange and white striped paper. I wanted to back those circles with some black paper, but I ended up just tracing a cd and cutting those out myself so I could really maximize the use of the paper. One thing I'm not crazy about with the Silhouette is that it only accepts paper as wide as 8.5 inches...but besides that, I love it! And I'm not getting paid to say that, although I wouldn't mind if I did ;)


I laid it all out to see how it was looking so far, and I felt it still needed something. Anybody else thinkin' cat eyes for the O's? I also wanted to do orange paper behind the black paper, so I traced a cd again, but cut it out with some heartbeat edge scissors.

I wanted to add a little more detail to the banner, so I printed out a bat outline that I found on the web (get it, web? Ok, that probably wasn't very funny) and I cut out 2 bats on black paper then sprinkled them with some black glitter, and I gave them creepy red eyes.


Next, I glued everything to some black ribbon and called it a day!


I'm loving the glittery cat eyes.


I realized it looks pretty boring on the white wall, so I also took some pics 'on location' to show the different possibilities.

On a weathered fence:


I'm lovin' how it stands out against the wood.


And the bats look so sparkly in the filtered sunlight.

(Oops, I think I missed a spot of glitter!)

Don't those eyes look great in the sunlight?


And a pair of eyes are peering through the fence?


It can also be hung on a tree to greet your party guests:


Cheshire cat, anyone?


The bats look like they are right at home!


So many cool possibilities!


Photobucket

 
Funky Junk's Sat Nite Special
 
UndertheTableandDreaming

Tuesday, September 21, 2010

Lil Cowboy Sign

As I've mentioned before, Elijah kinda sorta has a cowboy themed room. I didn't want to go over the top with the whole cowboy look, but I also wanted people to be able to tell that's it's kinda sorta supposed to be cowboy themed. I felt like the little cowboy print and the old lantern lights weren't quite driving the point, so I decided to go a more obvious route and make a 'Lil Cowboy' sign. That should ensure that there's no confusion!
=)

The first thing I did was type 'Lil Cowboy' in Word and printed it out (each letter was a whole page). Next, I turned the printed side facing down on my green scrapbook paper and traced along the outline of each letter, which transferred the outline onto the scrapbook paper. Would you believe I just discovered that by accident?? I know you guys are probably thinking now that I must live under a rock!

After I had that all cut out, I went to Home Depot and bought a pine board that was 10'' wide and 6' long.

I wanted to add some character to the board so I got this brilliant idea (<--- That would be totally sarcastic) to make it look like planked floors, so I got out some long metal thingy I found in the garage, a flathead screwdriver, and a wood chisel (which is not pictured because I was expecting this would be easy to do with just a screwdriver, but I was oh so wrong!). I marked 3'' in from the top and bottom edge then used the metal thingy I found in the garage as a guide to run the screwdriver and chisel along to create the 'planks'.

TIP: It was easiest to use the corner of the chisel for that part.

Next, I made random vertical lines to make it look like several different boards were running horizontally.

TIP: It was easiest (and I use that term lightly) to use the whole chisel when making these lines because the chisel gets stuck on the wood grain, leaving little divots.

Next thing I did was stained it Early American by Minwax. To make it look a little more realistic, I put a tack in each corner of each plank.


I'm waiting until I move (which by the way is in less than 3 weeks!) before I attach everything, but I laid it all out so you can at least get an idea of how it will look.


I got the iron star from a local flea market and they will be popping up in other places in his room (stay tuned for that!).


I originally inked just the edges of the letters, but it stood out too much, so I went and inked all over them for a rustic look.


This should make for a great little addition to his room!


Funky Junk's Sat Nite Special
 
UndertheTableandDreaming

Tuesday, September 14, 2010

Persimmon Painting

I don't have any lame attempt at a tutorial for this painting because I did it two years ago before I started the ol' blog, but it just reminds me of Fall...and eating persimmon cookies!


And I wanted an excuse to link up to the Fall Festival at This Blessed Nest.


Photobucket

Sunday, September 12, 2010

Happy Bloggyversary To Me

I just realized my bloggyversary was a few days and I wanted to give a BIG thanks to all the people who read regularly and have let me know that someone out there is interested in my projects.
Thanks guys!!! I would hug you all if I could!

Wednesday, September 8, 2010

Weathered Baskets

My dad got these baskets as part of a Grey Goose gift set and was planning on giving them away, but I knew I could make something out of them with a little spray paint.


I decided to go ahead and paint them espresso to match my wicker chairs, but I recently decided to put them in my (beachy) room instead.


The dark brown just wasn't gonna cut it, so I figured I would attempt to make them look weathered.

I started by dry brushing a coat of beige paint on the baskets. I should probably note that I didn't look for any inspirational pictures and I decided to just wing it, but looking back, I wish I had some inspirational pictures to make the process easier.


Next, I tried dry brushing on some tan paint.


Still not the look I was going for. I also tried some watered down white paint and that wasn't cutting it either. I finally realized I needed to paint it a little bit lighter than the original brown so there wasn't so much contrast and this is what I ended up with.


I'm thinking of using more of the light brown to cover up some of the light spots - what do you think? Leave it or paint more?


Funky Junk's Sat Nite Special
Related Posts with Thumbnails